“Engulfed” Part 3 ~ The Making and Unmaking of an Installation Part 2
Kenny Jensen Blog Post # 6 ~ June, 2021
Gallery and Beyond:
In this post I will share some of the installation and deinstallation process of “the Understory” in the gallery, as well as the process of transporting and storing the artwork after leaving the gallery.
5. Transfer Template Points
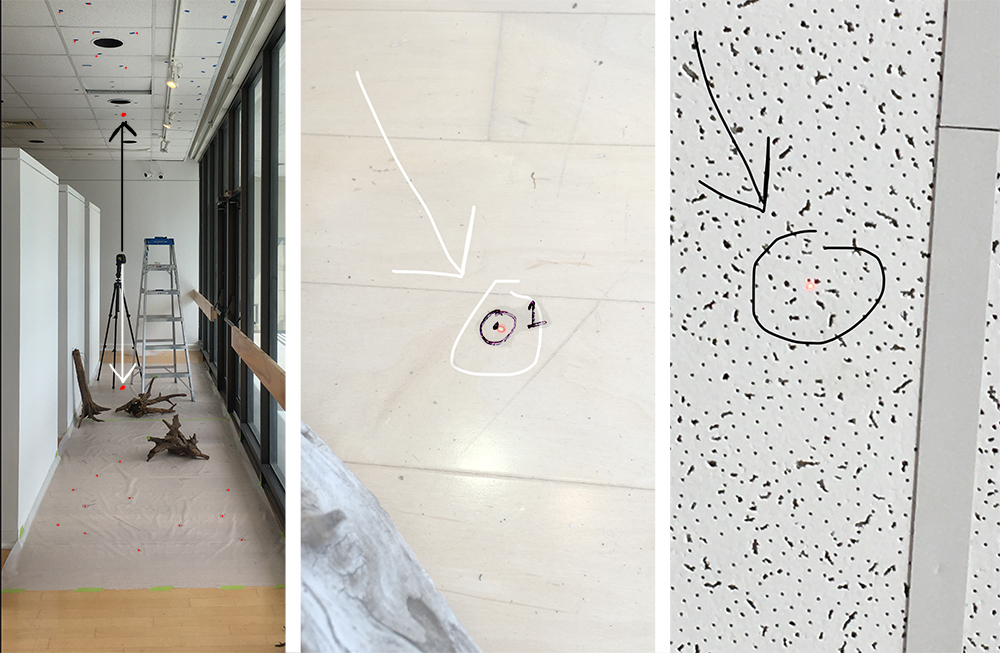
After many days of experimenting and adjusting I determined the placement and height of about 60-70% of the overall installation, which also included the placement of the objects that rest directly on the floor. The next step was to create a template the same size as the install space to record all the coordinations that would allow me to transfer all the ceiling installation points to the gallery. To achieve this goal I purchased a special tripod mountable lazer level that included a plumb line feature. In the studio I lined up the plumb line to transfer the ceiling points to the floor template. As shown in the image above, I reversed the process in the gallery to mark all of the installation points.
6. Object Installation
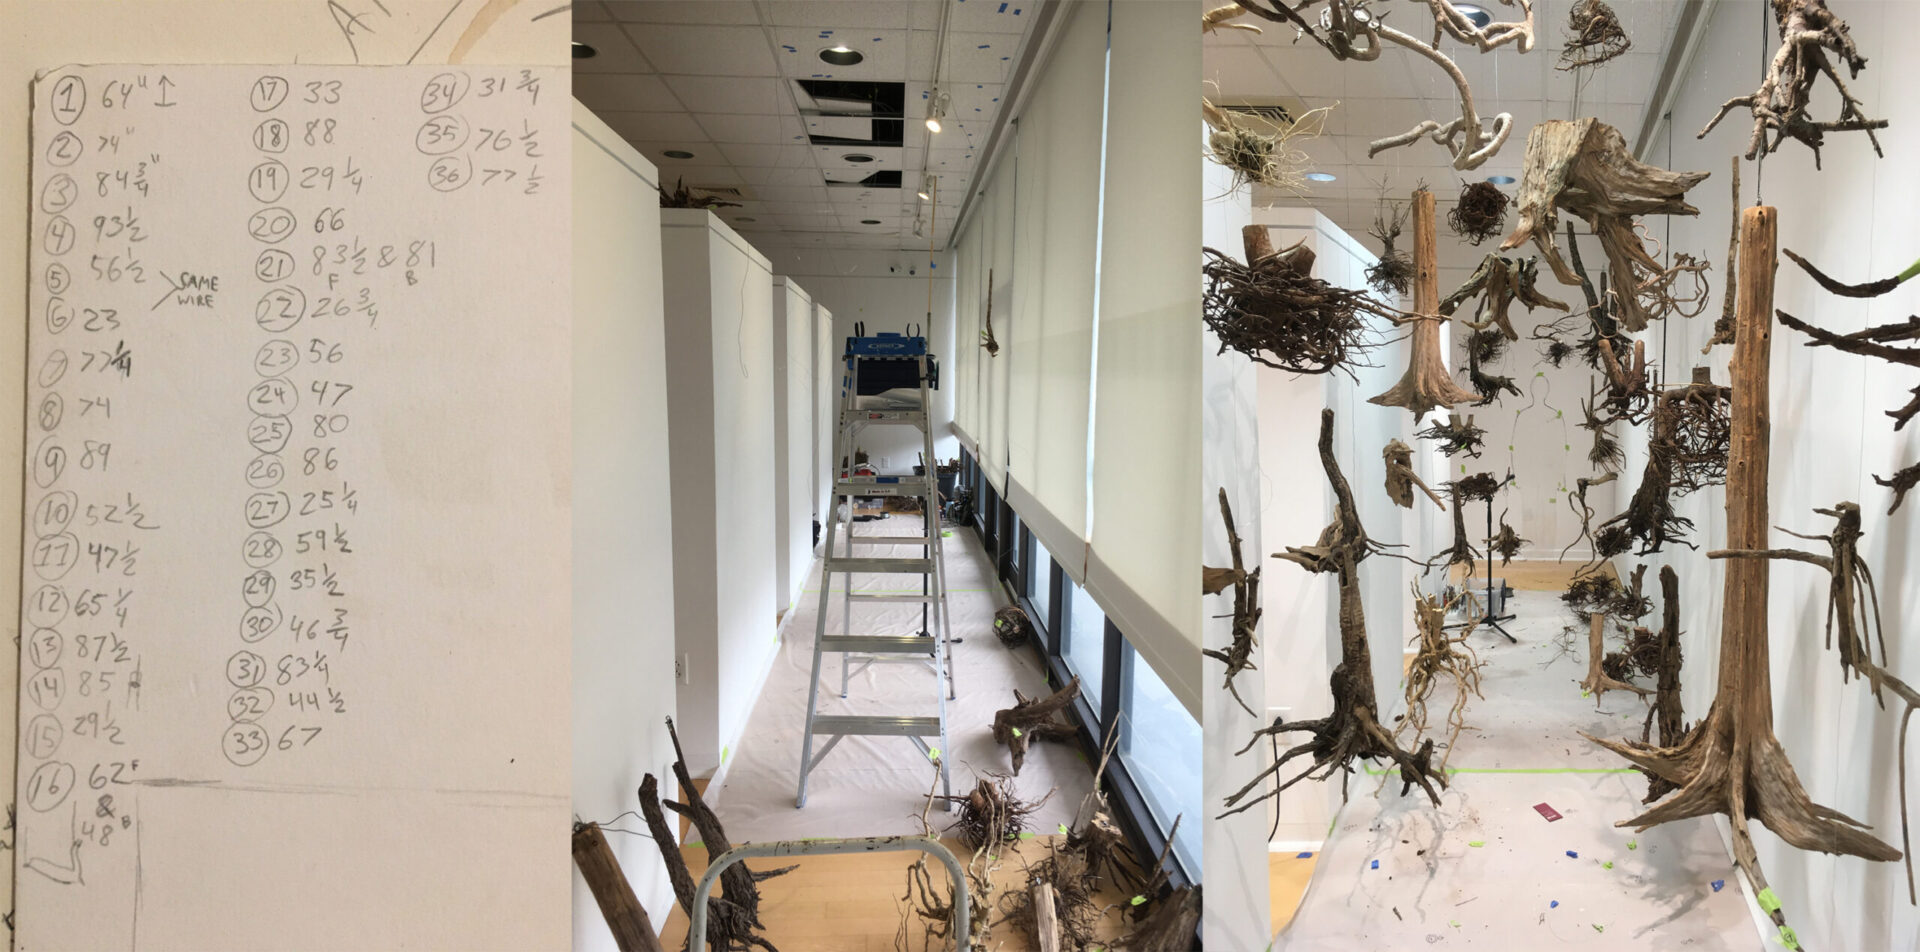
Once all the points were set, I determined the type of the wire used based on the weight of the object, poked it through the acoustic ceiling tile from above, and attached each line to custom anchors on the reverse side of the tile. I approximated the initial height of the objects based on the measurement I recorded from the ground to the top of each object. Most objects required additional adjustments. to get everything to line up correctly.
7. Closer to Home:
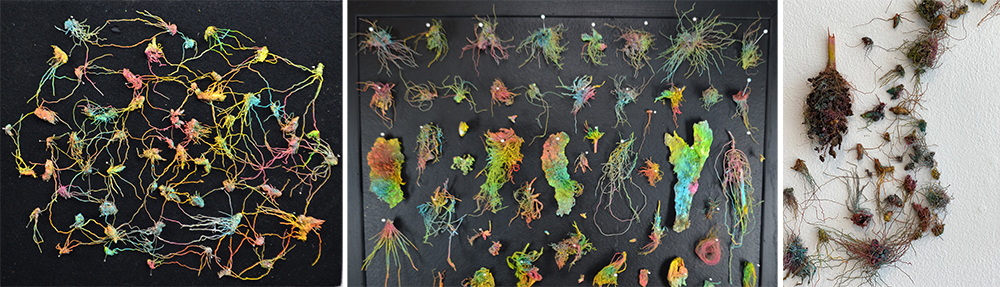
During the multiple days of hanging pieces from the ceiling I reflected on what would work best to further define the human outline on the gallery wall. I played around with several options, but had the best results using a variety of common grass root sculptures taken from local yards. I have been collecting dead lawn roots for more than a decade, and painted them to use in a variety of projects around 5 yrs ago. The smallest roots were quite difficult to attach to the wall. I started without a specific plan and just intuitively arranged them until I ran out of materials. The gallery staff had no idea what I was going to do on that wall beforehand. I think that were pleasantly surprised. I am pleased with how it turned out.
8. De-Installation:
I have included a time-lapse of the deinstall to show how just how many pieces were included in the completed installation.
One of the student workers Daevion Givan assisted me both towards the end of the install with the final pieces that were not laid out prior in my studio, and he assisted with the entire deinstallation process. I enjoyed working and talking with him. He was a big help and also provided helpful input and feedback.
9. Transport
![]()
In addition to the more obvious tasks in the gallery space of installation and deinstallation , I spend a lot of time and energy
on the in-between tasks that make the gallery work possible. It can be challenging to pack, haul and transport organic forms that don’t easily fit in containers etc. In addition to the awkward and incompatible shapes, many of the roots used in this installation were also, very fragile. Several pieces were damaged during the packing and transport. Thankfully I was able to fit the entire post-installation mess and my tools into this little truck that my father kindly lends me to help make my art possible. Thanks Dad!
10. Organization & Long Term Storage:
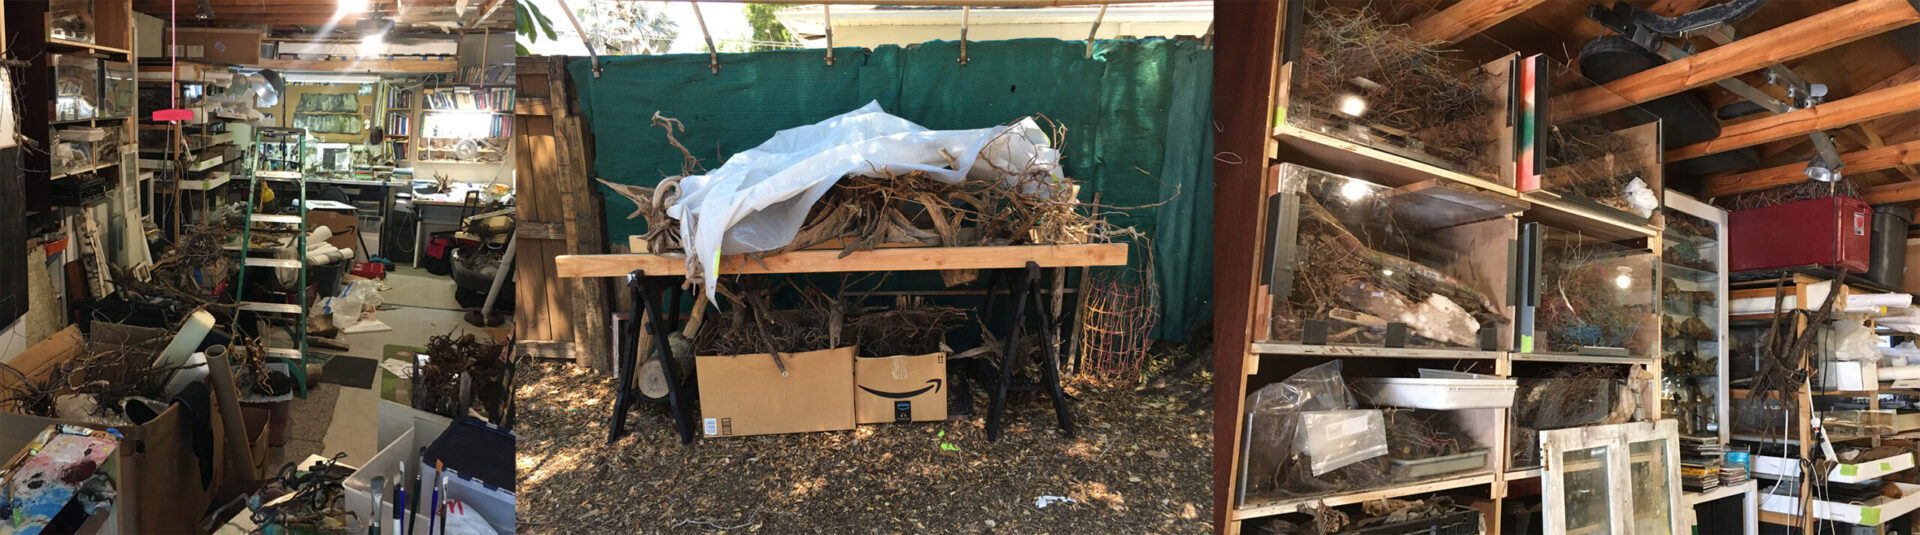
Another challenging aspect to creating large scale installations containing multitudes of objects is finding adequate space to safely store everything before and after exhibitions. I had to temporarily store many of the larger objects outside in my yard to make room for other projects in my studio and prepare for packing. The smaller pieces up out of the way as much as possible.
Thanks for your interest in my process!