The Making and Unmaking of an Installation Part 1
Kenny Jensen Blog Post # 5 ~ June, 2021
Laying the Ground Work for “The Understory”:
I am following up the last post about the “Engulfed” exhibition with a two part in depth behind the scenes look at the process of creating a complicated site specific installation. This first section will focus on all the background work that was developed prior to actual installing in the gallery.
1. The Source
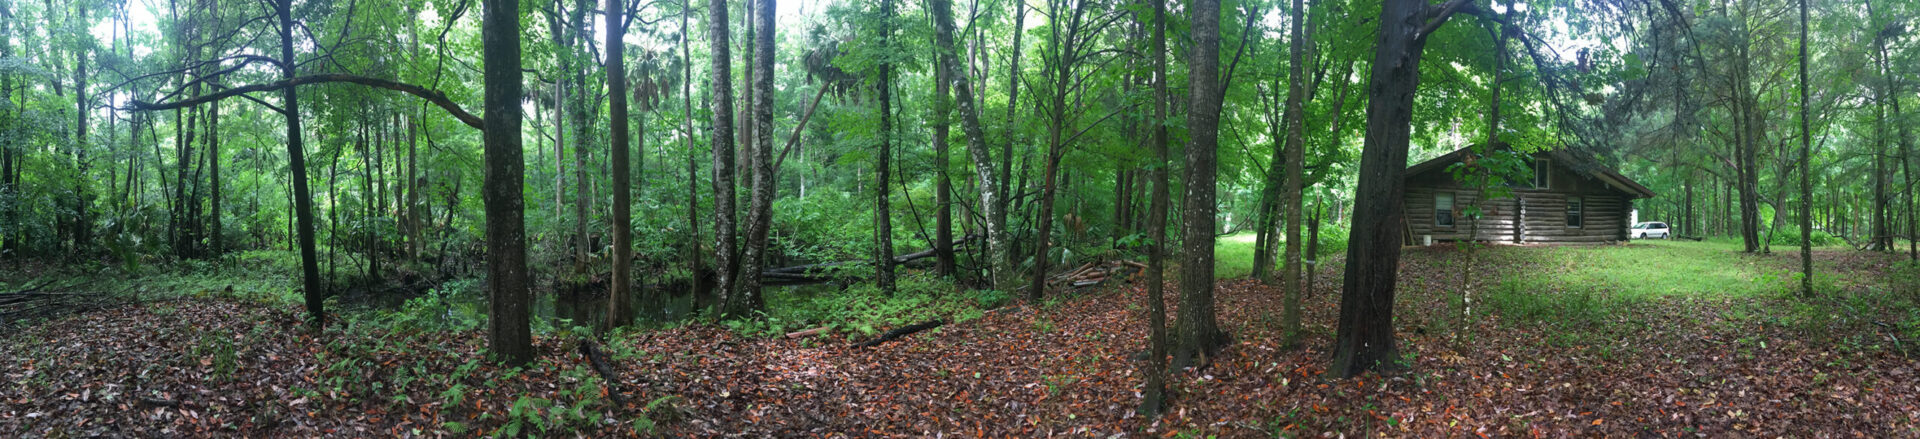
Most of the roots used in the “Understory” installation – especially larger ones, were found at our family land “The Floating Woods” in Gulf Hammock Florida. I have collected hundreds of specimen while stalking and forest bathing in the hammock forest and surrounding swamps for for the past dozen years. In addition to wilderness collecting, I also acquired many specimen, especially some of the smaller objects from years of local landscape gardening jobs in the Pinellas area in the early 2010s.
2. SPAACES Solo Exhibition
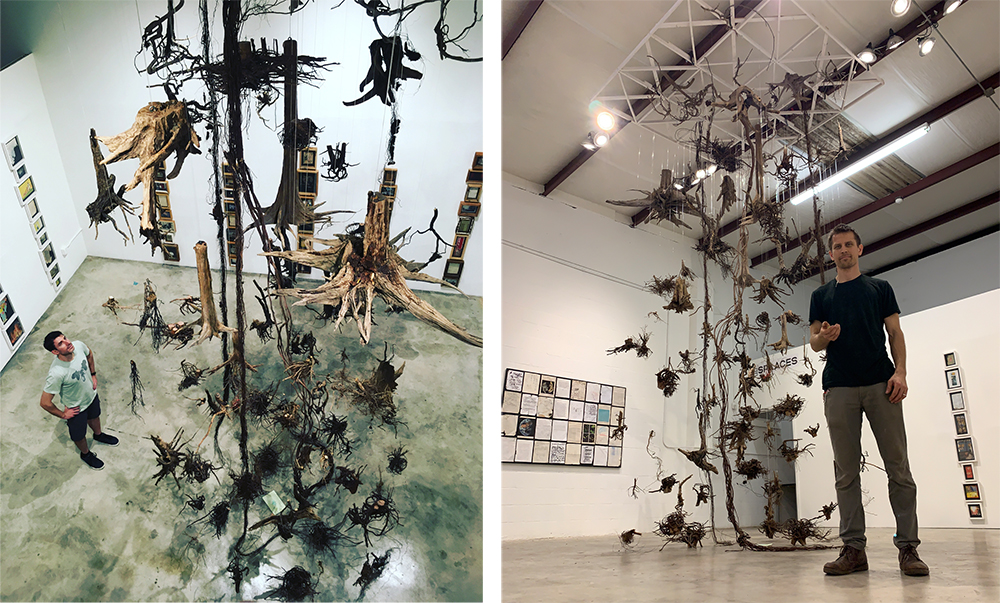
In February 2020 I had a solo exhibition “Unearthing the Understory” at Spaaces gallery in Sarasota, which featured a large scale installation of roots hanging from the 20ft ceiling in the center of the gallery. I had to design, construct and install a wood armature structure to the warehouse ceiling trusses to provide adequate support and hanging points.
While looking for artists to include in “Engulfed”, Curator Amanda Poss came across this work on my website. She invited me to create something similar for the Gallery 221 space.
3. Working Within a Limited Space
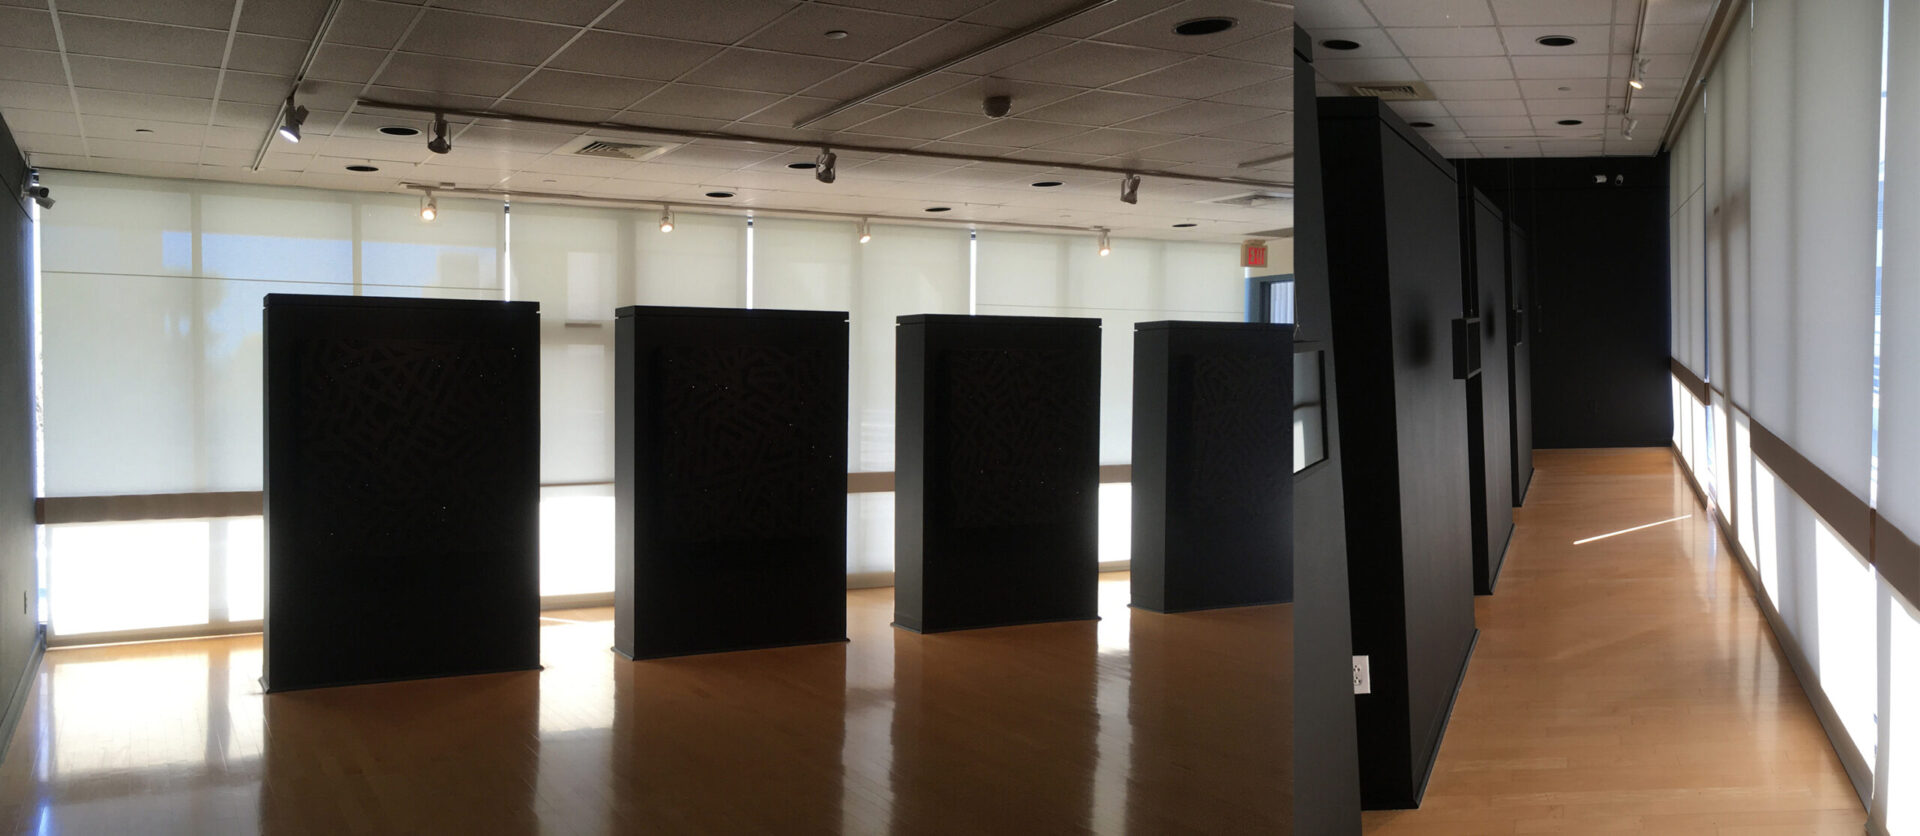
As you can see, Gallery 221 is a much smaller/shorter space than Spaaces Gallery. I initially thought the curators wanted an installation hanging in the Center of the big space like the prior installation. However, in further conversations, I discovered they were actually thinking for me to use the space against the windows behind the free standing walls (the “teeth”). This presented quite a challenge for me. I had to work through several key questions – do I need to worry about conflicting with the work of the front side of the walls, should part of the space be accessible to viewers, what is the best method of hanging the objects from the low, drop ceiling etc, etc, etc. My wife Maggie had good advice. – Just focus on the space itself, don’t be concerned with what unknown things will be happening with other artists around it.
4. Studio Experimentation and Mock-up Install
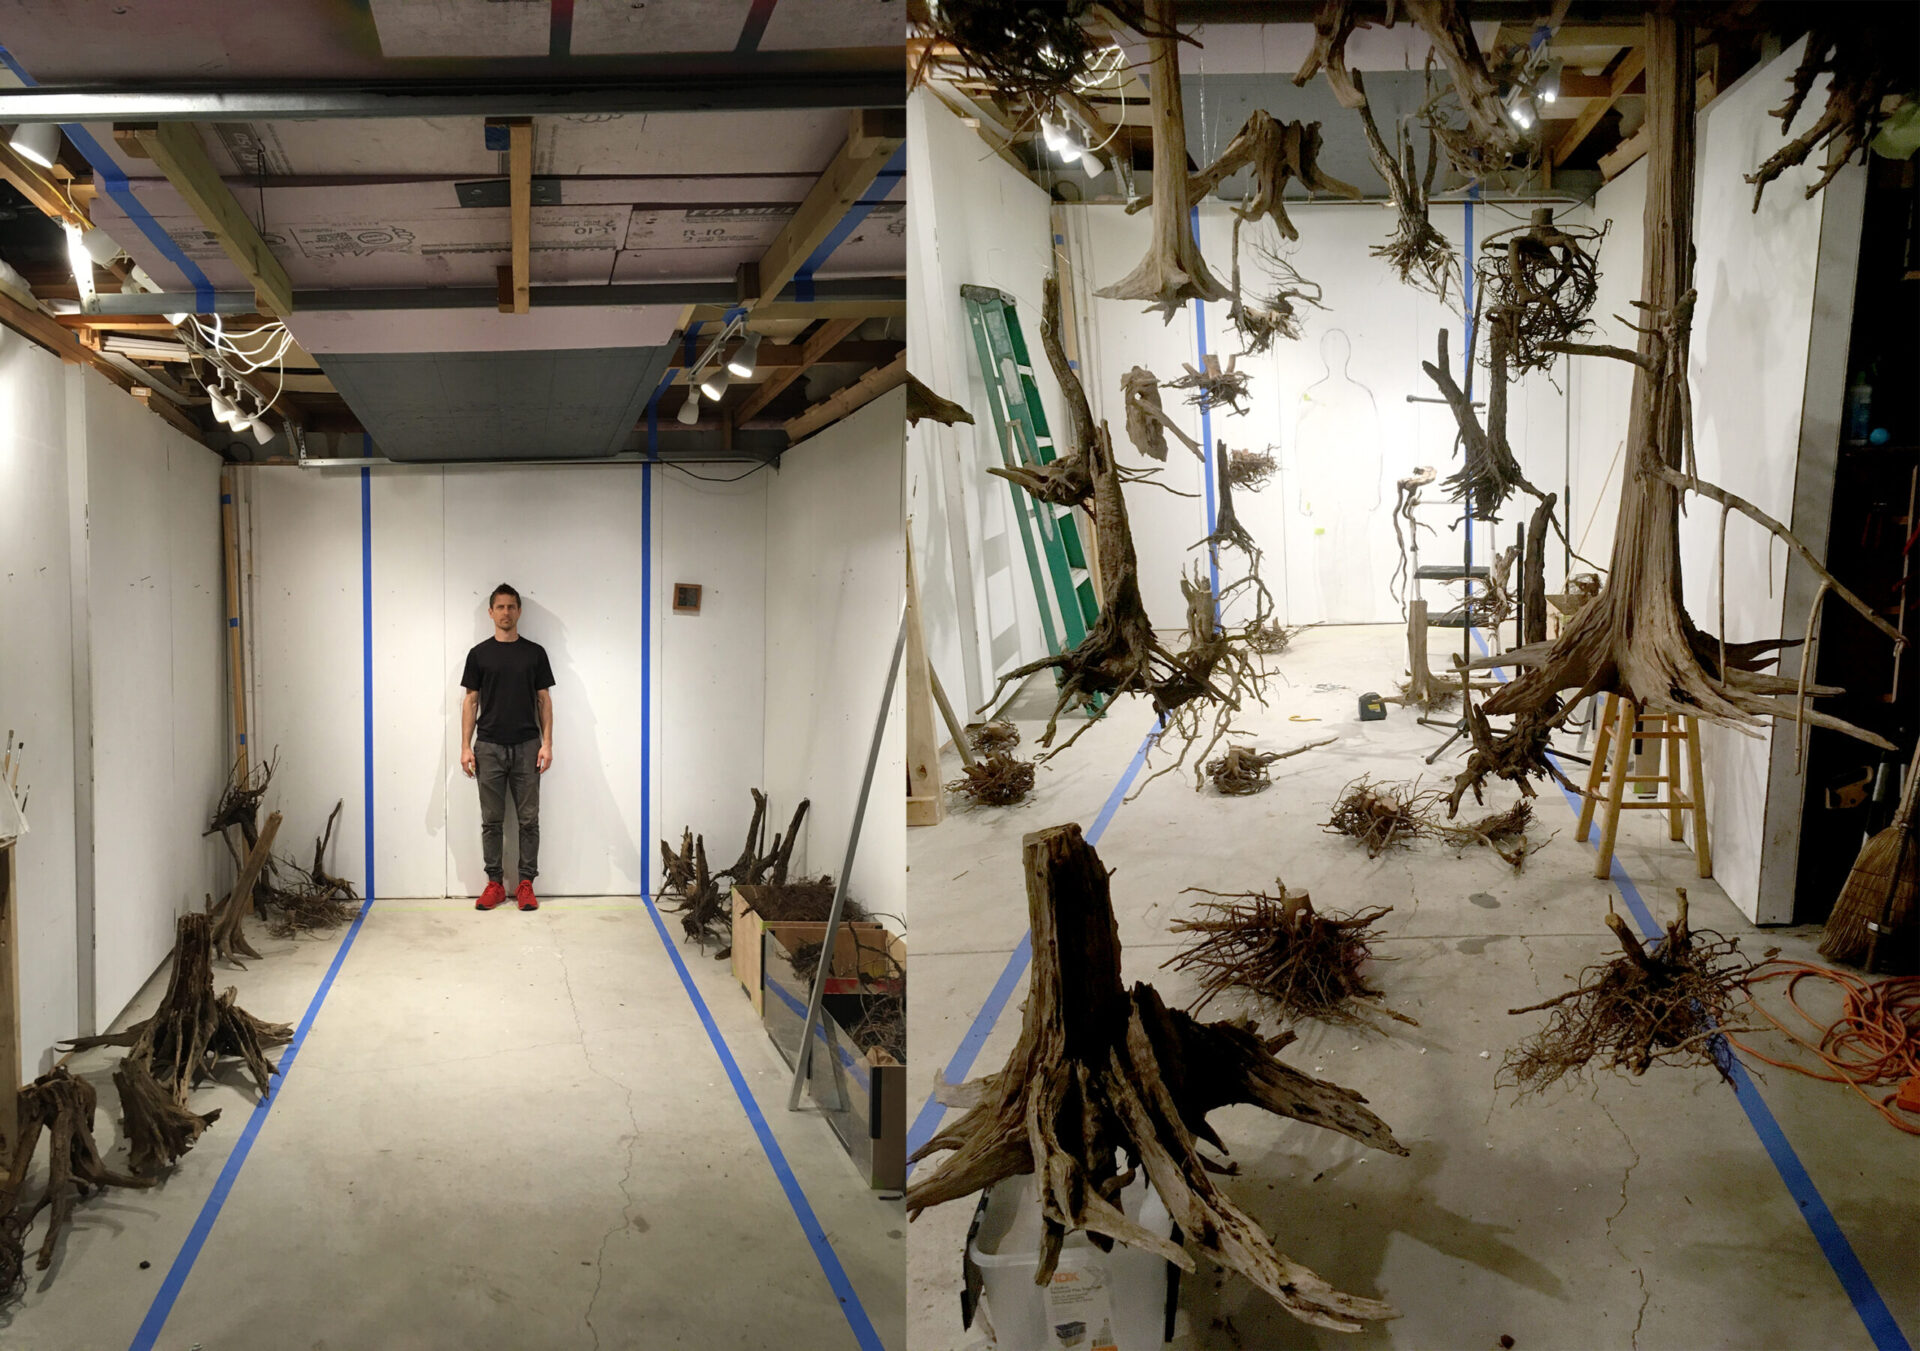
My goal was to create a site specific installation that best fit the unique challenges and advantages of the space, this included the long, narrow “hallway”, the wall of windows on the south side, the end of the wall on the east side, the window on the west side, and the 2ft gaps between the 4 “teeth” on the north side. In addition to the installation, the curators were also interested in my “Seeds” installation of 16 framed 4×6 film prints, which I determined was best to install as a close grid on the back side of the first “tooth”. This would also provide a good vantage to view the installation. With those parameters in mind, I mapped out the remaining available length and width dimensions in my studio and installed a temp ceiling made from repurposed foam that spanned the whole length above. This provided full access to install throughout the entire ceiling to play around with placement, so that I would eventually know exactly where to place most pieces prior to installation, so that I didn’t make tons of holes in the acoustical ceiling tiles. Also, I had limited time to be able to install in the gallery, so I wanted to focus on determining as much of the object placement as possible prior to the gallery. While playing around with a variety of options I started to see the installation like a tunnel under ground the viewer looks through. A void in the shape of an average human (which is just about my height…) missing from nature.
continued on the next post…