Figure Drawing Process

The more people are staying home due to the Coronavirus, the more they are using their time in creative ways. I wanted to provide a little lesson to inspire people to start drawing from life. Even though I’ll be talking about figure drawing specifically, many of these techniques can be applied to drawing anything.
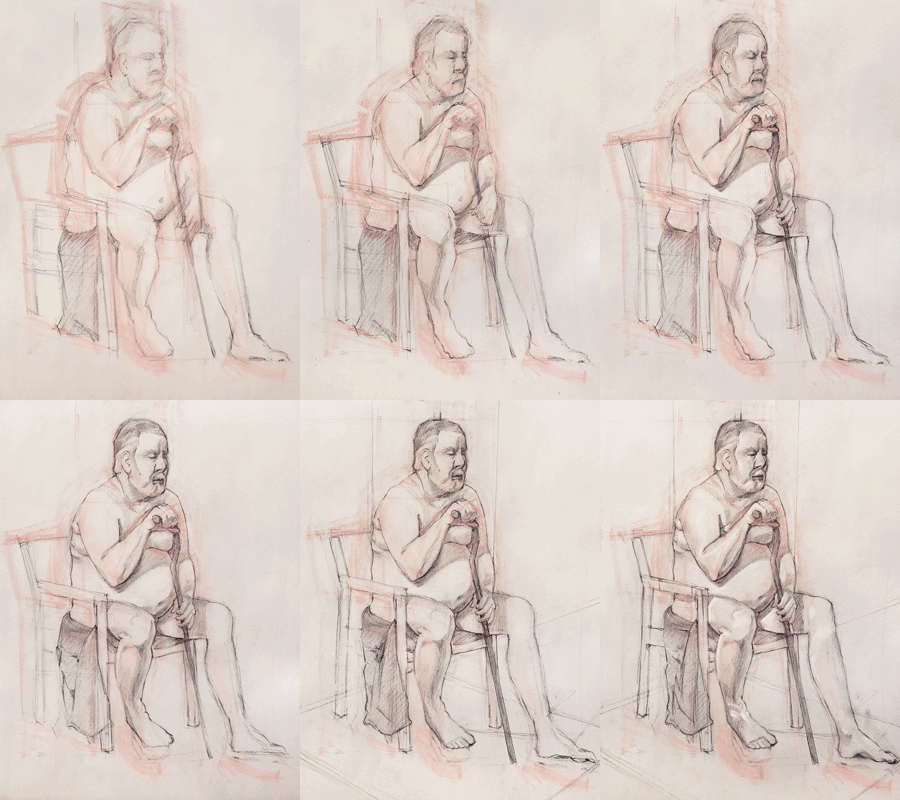
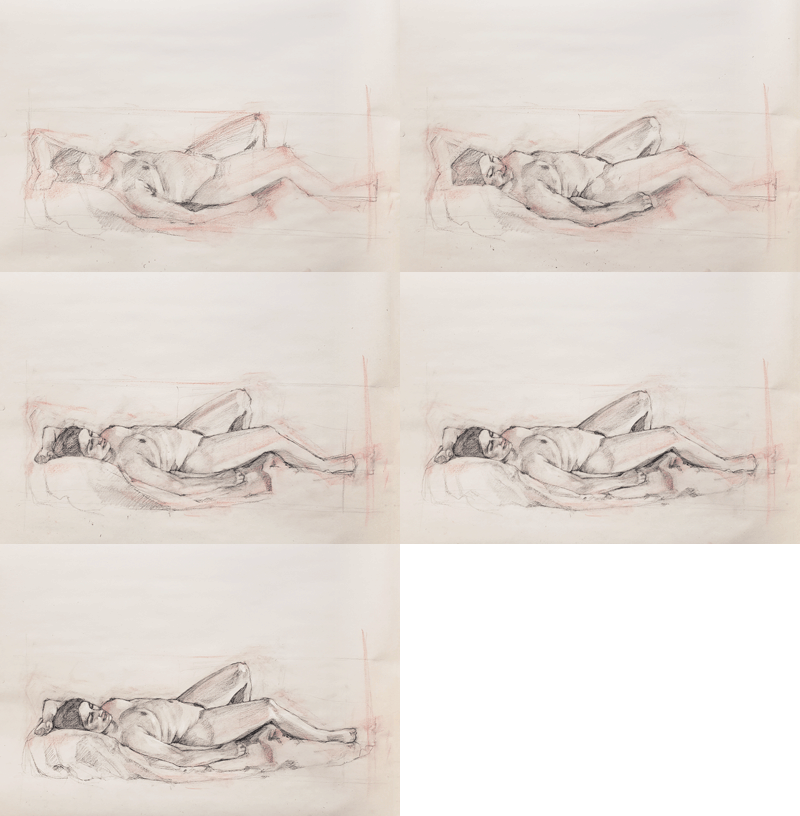
In the GIF above, you can see how the forms go from general to more specific, as well as from from light to dark. The pink in the background is chalk pastel. I use the chalk pastel to do a gesture, a fast drawing that captures the general pose or shape of what I am drawing. When doing the gesture, I am thinking about things such as the overall angle of the figure, the tilt of the head, the angle of the torso, and the position of the legs and arms. I use the gesture to place my figure on the page. At this phase, I can easily erase and redraw the figure if I don’t have it where I want. I typically spend no more than 3 minutes on this step.
After doing the gesture, I lay in some light lines with my charcoal pencil. I then start looking more closely at the proportions of the figure. I’ll use a string to see if the overall height and width of the figure are correct and adjust as needed. To do this, I mark where the top, bottom, and sides of the figure are. I then position the string on each side of my drawing and compare this width to the height of the figure in my drawing. The important thing to note is the ratio. How many widths equal the height? The seated figure I drew above is about 1:1.5 width to height. The reclining figure below is about 1:4 height to width. I can then hold the string up to the model and see if this is accurate. If not, I may need to make the drawing either taller or wider. Keep in mind that your arms should be fully extended when measuring your subject and you should be standing or sitting in the same place to make sure your measurements are consistent.

In the same way I checked the overall height and width of my subject, I can check the head heights using the string. See my Math and Art blog post for a visual demonstration of finding head heights. I also hold the string up vertically to my subject to see what areas line up and compare this to my drawing. It is good to step back and look at your drawing periodically to see if it looks right. If something looks off, using your string will help you to adjust it accordingly.
I start putting in the shadows from the beginning. They start light and loose and I refine and darken them as I go. When I do life drawing, I work on newsprint, which is an easy surface to erase on. I think of my eraser as an additional mark-making tool to carve out forms. I add the bright white highlights with chalk pastel at the end of the drawing so I don’t muddy up the charcoal.
This is a very brief overview, but I go into much more depth in my figure drawing class at the Dunedin Fine Art Center. The art center is closed at least through April 12th due to the Coronavirus, but I plan to teach a class over the summer if we are in the clear by then.


