First, I have to say that I’ve learned a valuable lesson regarding the subject of stress. For the past several weeks, I’ve been thoroughly stressed out about completing the third and final painting in my triptych series, which I’ve affectionately dubbed “The Big Apple”. I had the preliminary sketches done and the canvas was prepared and ready to go. All I had to do was sit down in front of my easel and paint! But no, I kept worrying about whether it would work out or not. I worried about whether the last painting would be as good as the first two. I just worried and stressed myself out and then worried some more. But when I finally said to myself “Stop it!” and I actually pushed passed all the worry to sit down and start painting, guess what happened? The worry and stress disappeared! I got into my painting “zone” and happily produced the painting that I had first envisioned. So, the lesson learned was that I can create my own stress (and do it very well indeed) by simply doubting myself and procrastinating, or I can just skip it and paint. I won’t be doing that again!
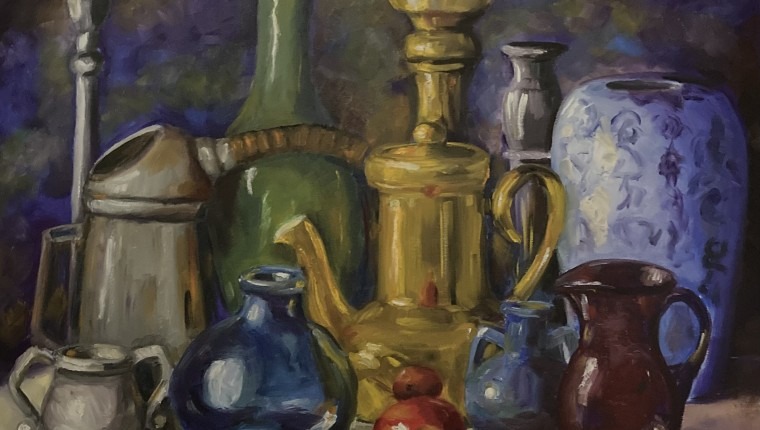
Now to discuss the final painting! It came out great and the finished product is here at the top of the page for all to see. As mentioned in my last story/blog, each step toward completing the work is the same with every painting. 1. Set up the grid. 2. Establish the composition so all elements fit comfortably within the parameters of the canvas. 3. Paint in general areas of lights and darks using a single neutral tone. 4. Fill in the basic background color. 5. Begin to fill in the colors, with light and dark shades, of the various objects and elements. Once those five preliminary steps are in place then you can play with colors, adding intensity, contrast and other cool stuff.
Below you can see an image of step 5 as mentioned above. Each of the objects are “worked” back and forth with the other objects around it so that they complement each other in terms of color, light/dark balance and proportion. For instance, I found that I had to make the purple glass pitcher on the bottom far right a bit larger than I first sketched in. Doing that made it appear to be more in the foreground.

I also went a bit crazy with the background. The various colors are made to move and flow through and behind the objects, which assists the viewer to take in the entire scene in addition to focusing on each object. The final steps to this creation were, of course, to add the necessary details. I added just enough to make each area “sing” without getting so detailed that the focus went on that instead of the overall communication of the piece.
The finishing touch will be to let the painting dry completely (which takes roughly two to three weeks) and then varnish it. That “seals” the paint and protects it from the elements. Once that’s finished then it can be framed and hung in the exhibition hall! I can’t wait to show you all three paintings, side by side. It’s a whole new experience for me as an artist and I’m thrilled to share it with you. Thanks and enjoy!


