Laura Spencer Illustrates
2019 Emerging Artist Grantee
Post 07 – Nesting
TLDR: I’m continuing to develop my pieces for the Emerging Artist Exhibition – our deadline is looming and as a digital artist, I’ve got to get my assets to print ASAP in order to get the work back and prep it for the gallery.
Between the old 9 to 5 and my personal art grind, I’ve got my face to a screen more than 16 hours a day. And yet there still never seems to be enough time! I’ve been working tirelessly to get my pieces together for this exhibit, all the while managing freelance work, as well as personal and family matters. It’s been a consistently crazy hustle, but my hairs haven’t turned gray yet!
I’ve made some great strides in my grant art, and I’m here to share it with you.
The Art of Nesting:
Nesting is not just for the birds. In print design, to nest is to lay out all objects onto a specific size of sheet good in a manner that is most efficient for printing and routing. Typically, this type of production work is left for the end of a design process. However, I had to special order the two [4′ x 8′] sheets of 1/2″ Black Sintra from my local printer prior to submitting design files. Luckily, I placed the order early last week so the goods should be at Florida Graphics awaiting my final art.
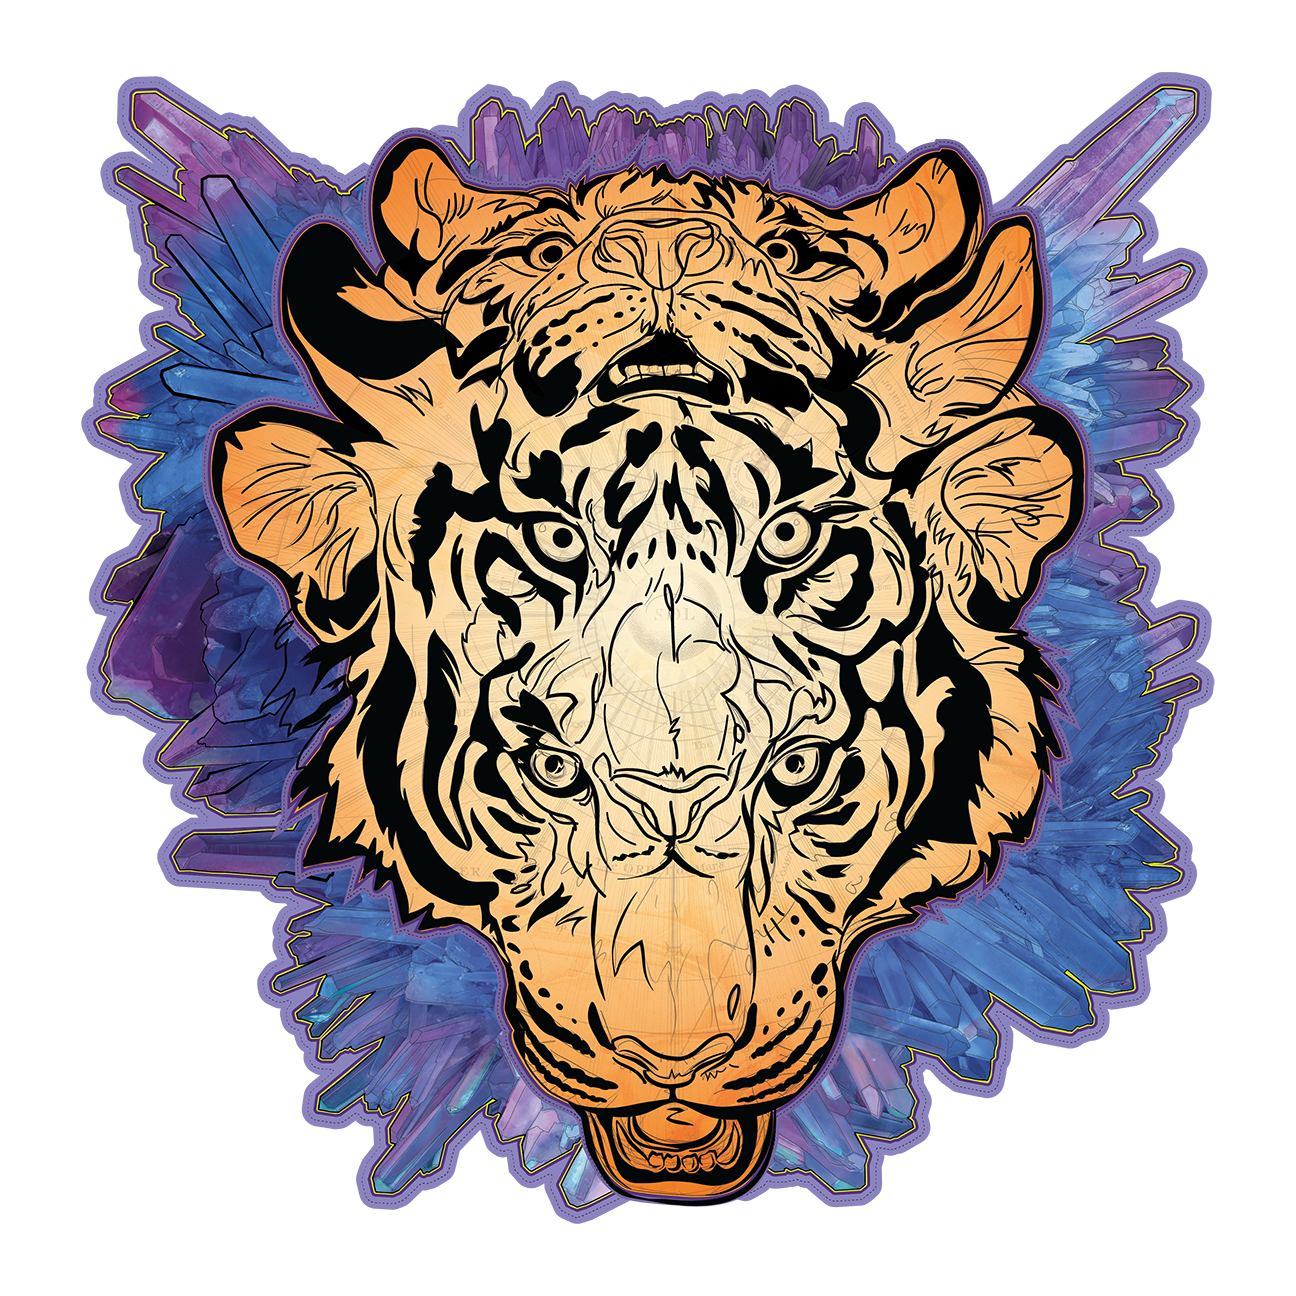
When it comes to nesting, one must always consider the size of the router bit. In this case, a 1/4″ diameter bit will follow along my carefully designed route lines. Unfortunately, this means that achieving crisp and sharp angles can be a challenge. Therefore, all inverse corners must be softened to accommodate this limitation. This also means that each piece has to be at least 1/2″ apart and away from the sheet good edges. My largest piece – the Tri-ger or “Gaa” as it may be titled – will be printed at a max. size of 47.5″ x 47.5″.
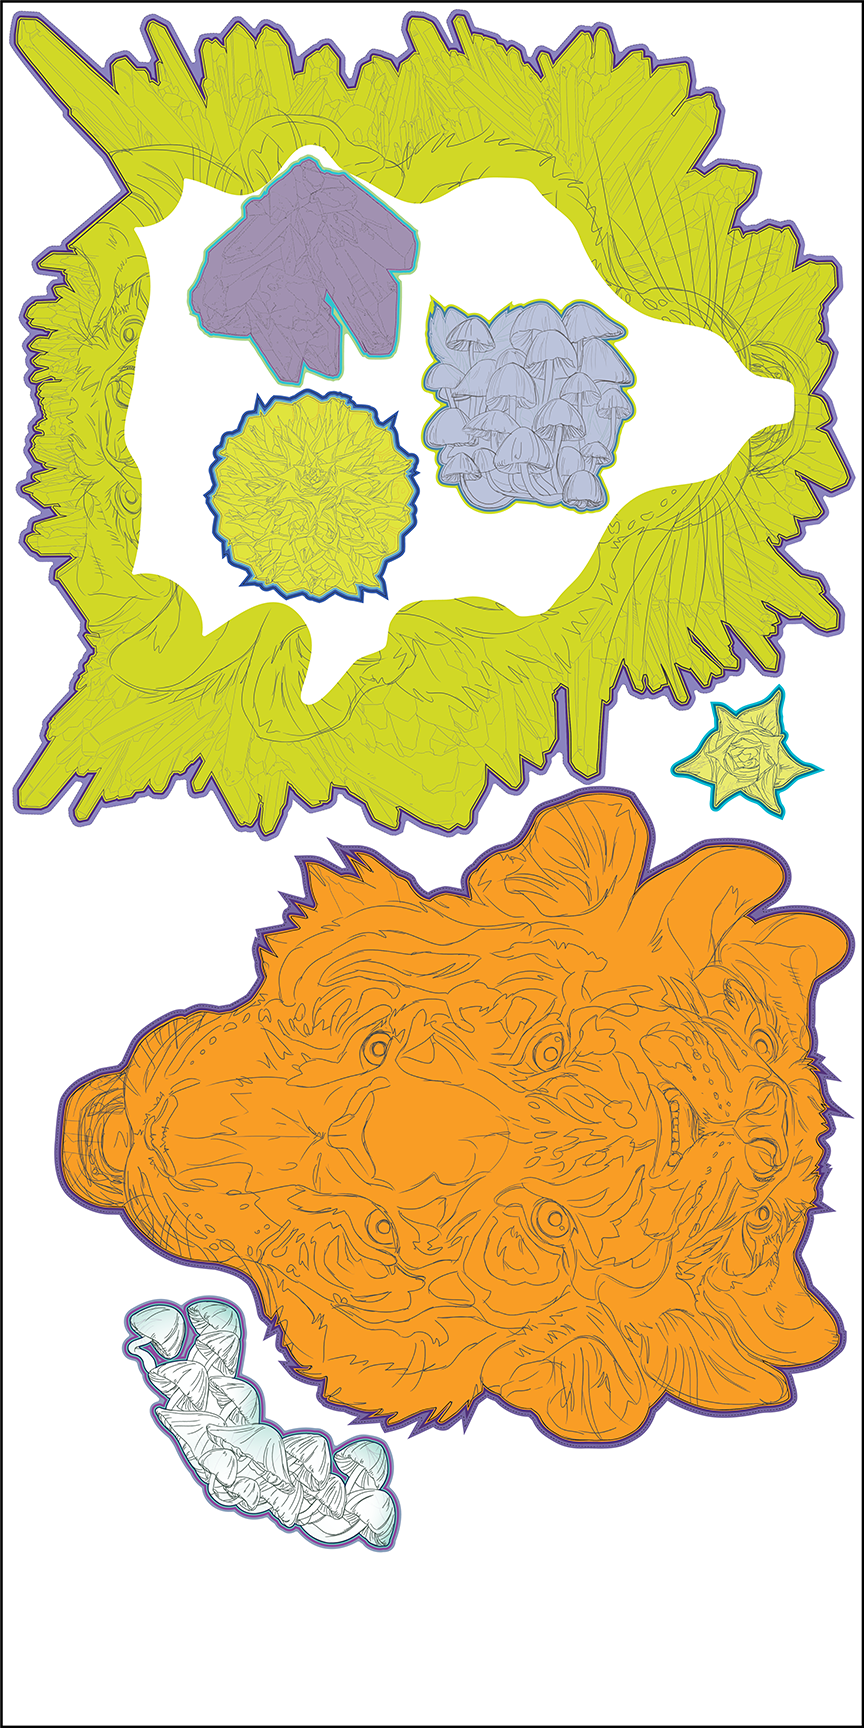
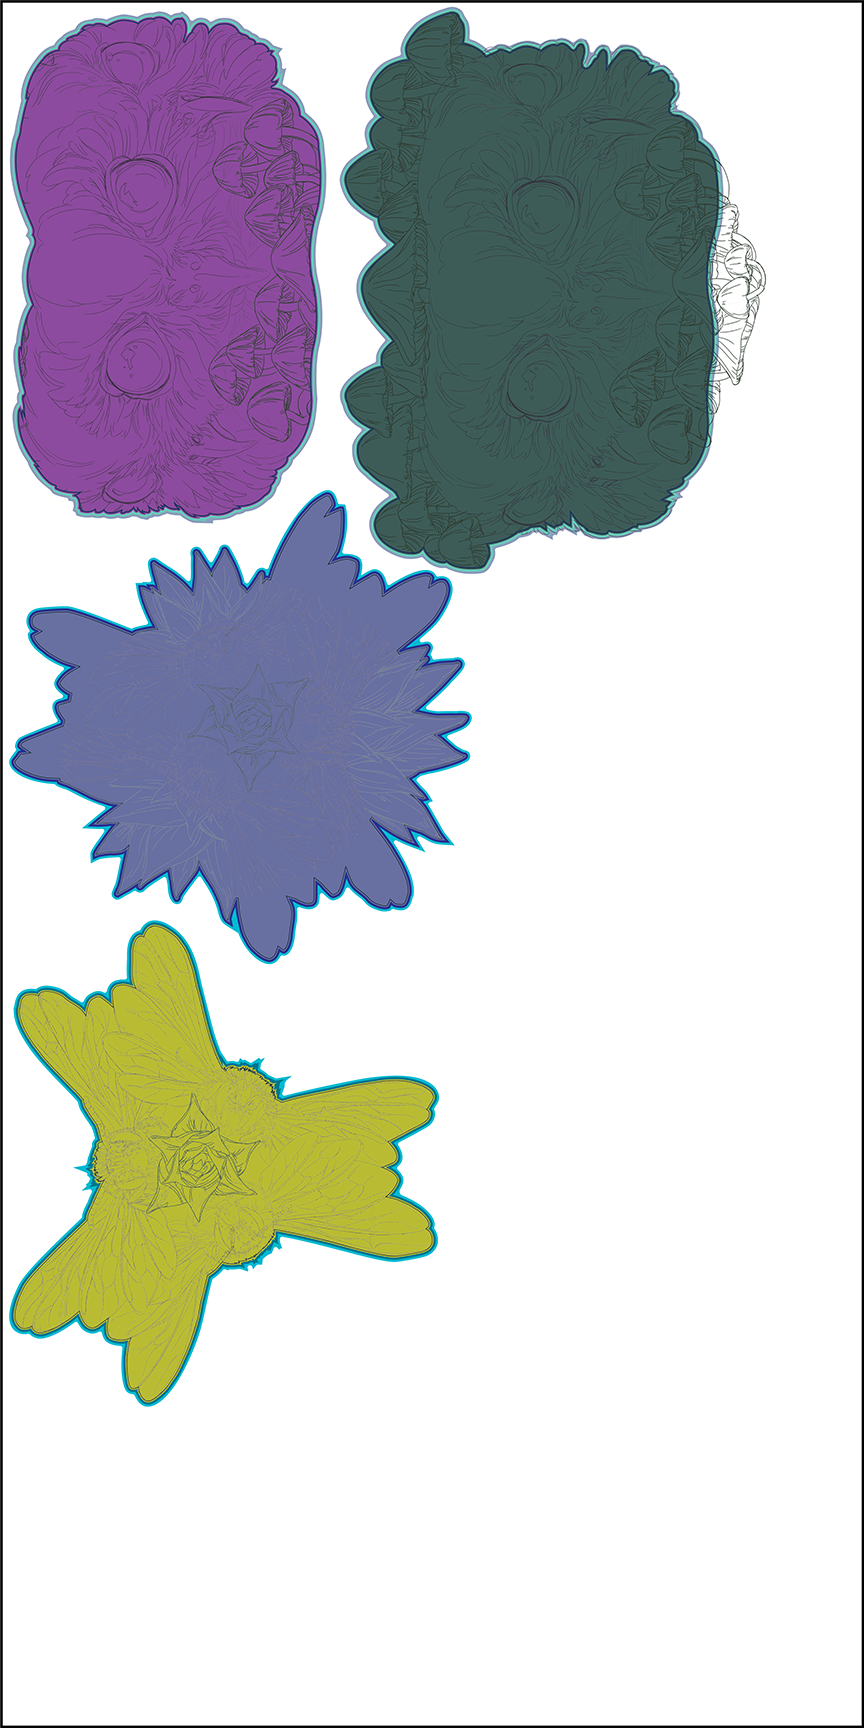
It’s important to provide an ample offset around each image, as the routing path can vary as much as 1/8″ all around. This is why I’ve chosen to create a sort of psychedelic set of offsets around each component [the brightly colored outline around each piece]. I think I will add more offsets, varying in color, depth, consistency, and frequency. Hopefully, this will help to emphasize and add a fractal-like aura around these ethereal pieces.
As you can see, this was a rather rough nesting pass; intended to ensure I had ample space for all the necessary pieces. In fact – it appears I’ve got some room to spare! I’ll be adding some extra special pieces from the Critter Archives to flush out the rest of the sheet goods.
Every Day I’m Vectorin’:
Now that the production work has been roughly laid out, I can finally begin on the best part of all – VECTOR AND COLOR!
I derive such joy from making clean and consistent line work, similar to traditional pen and ink techniques. I’ve been working with some Adobe Illustrator plug-ins to provide a more authentic and custom feel to my lines. Astute Graphics has two particularly awesome plug-ins for this: Dynamic Sketch and Ink Scribe.
Once the process of roughing in my vector line work begins, I like to place a few rough/in-progress color .pngs into clipping masks. This allows me to work more flexibly, instead of laboring over each and every little detail of vectoring, thereby running out of time for the most essential aspect – color and texture.
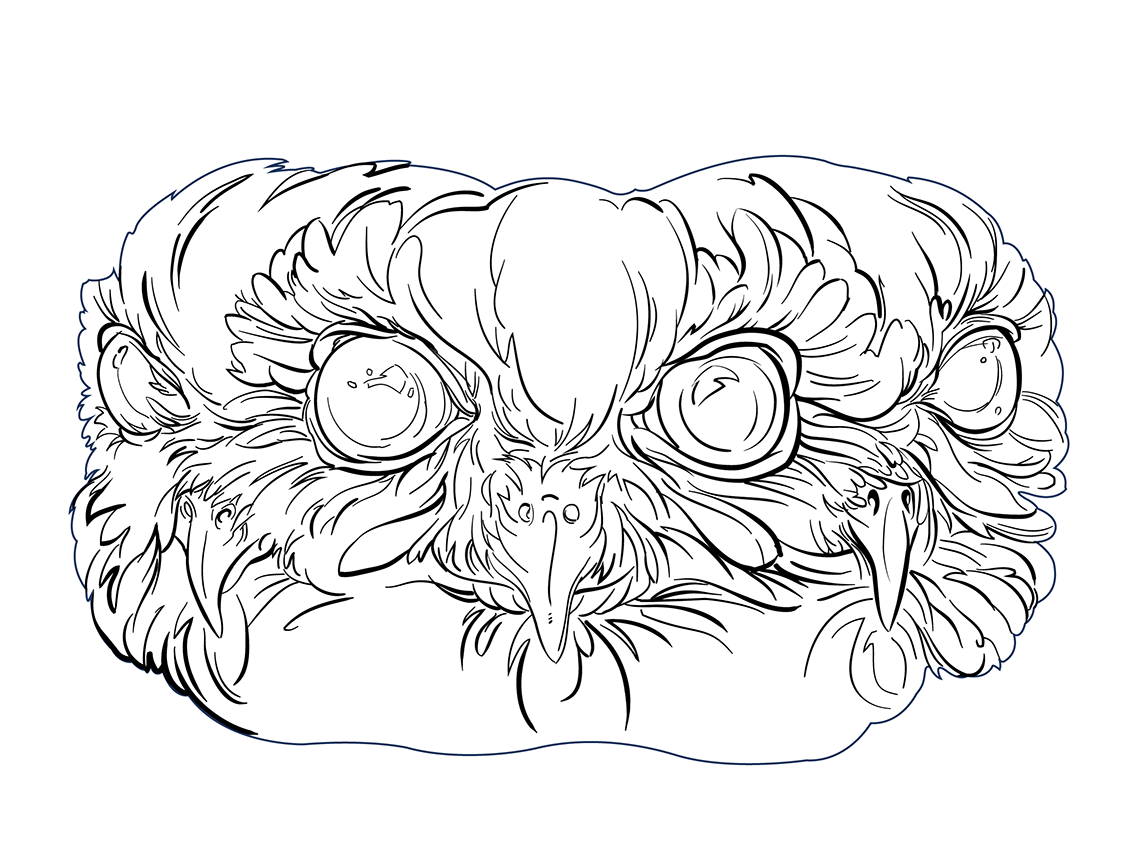
When working on concentrations of art, I’ve been trying to practice the art of designing in “batches” so that each and every piece gets worked to the same level of “completion”. I’ll go through and provide a rough vector for all the pieces, then begin color. After color comes another pass to refine the vector line work, then a final revision for color and texture. Right now, I am in between vector passes and color – so check out the little teaser of my Owls [a.k.a. “Long”] above. There’s more where that came from!
This evening, I’ve got another Mentor Meeting session with the one and only Mr. Chizzy Chad Mize – and I’m sure to gain some insights to share with you!
In the meantime, I’ll keep crushing it.
-LS
On my mind:
-
- What I’m reading:
One of the Most Important Court Rulings on Street Art Ever Is About to Happen - What I’m listening to:
SubPirate – Thiqq Bass Thump (A DJ Mix from Shine 2017)
- What I’m reading: