How I Make My Frames.
By Steven Kenny

Many people may not know that I’ve been making most of my own frames for many years. In the begin I would cobble them together using store-bought wood moldings from Home Depot or Lowes. That all changed when I discovered that I could design molding profiles myself and have them milled at the local lumber yard.
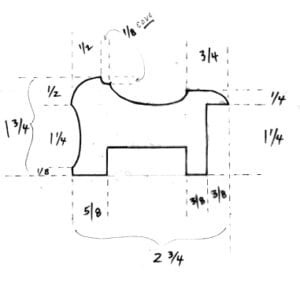
Following this schematic diagram, the lumber yard makes four separate steel blades, one to cut each side of the frame profile. Those blades get fitted into a large machine that mills the rough 4 x 4 inch wood stock. I always use poplar which is relatively knot-free “soft” hardwood. The individual milled wood sections are often 10 – 12 feet long. I them cut these to length depending on the size of each painting.

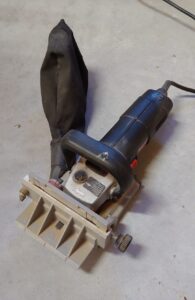
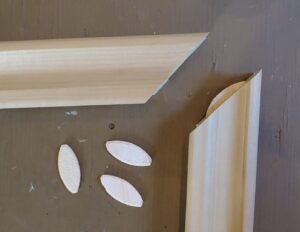
Once the four sides of the frame are cut to length, I then need to cut biscuit slots. Biscuits are wooden inserts that, when glued, hold the corners together without having to use nails.

A special tool called a biscuit joiner is required.
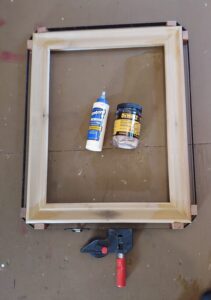
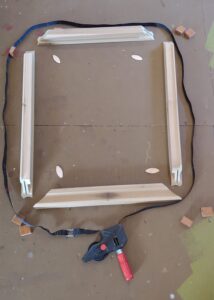
Now it’s time to glue the four frame sections together with wood glue.
I use a band clamp to hold the frame tightly together while the glue is setting.
Once the glue is dry the frame is ready to be sanded and painted or gilded.